I have a small server at home use which ran out of SATA slots when I needed to install more hard drives to satisfy my MythTV recording storage need. MythTV was which was filling up all available space by the hour. There were a couple of available solutions to the problem:
- install another I/O card,
- buy a NAS,
- setup a new server, or
- buy external USB HD containers.
The principle is to have a single case which only contains a PSU, and install all hard drives on a USB HUB inside the case using USB-to-SATA adapters. Here is what I bought for my installation:
- $20 Computer case with PSU
- $5 Four port USB powered USB HUB
- $2 USB extension cable
- $20x2 USB to SATA adapter cable
- $67 Total
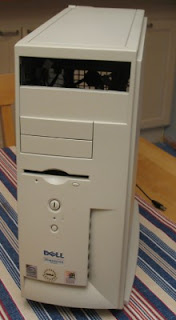
Below is the case I had lying around which I used until its PSU broke down and I bought the $20 replacement case. The case below is from the late stone age and had only two 3.5" slots, but it was quite sufficient to use for proof-of-concept.
Below is the USB to SATA converter I used in the project. Only the cables on the right were needed, the rest is just so much computer trash.
Here is a shot of the concept behind the system: the HD is connected to the converter which is connected to the USB HUB, which then is connected to the server via a USB extension cord (not shown).
And here is the complete system with two attached HDs. If you look closely you'll see that the HD mounted in the rack is an old IDE drive. The drives get their power from the PSU. Note: you will need to short circuit two of the connectors on the motherboard connector on newer PSUs to make the PSU start at all. Here is an article on it, and here is a video. You take responsibility of not frying your PSU in the process - make sure to verify that the PSU relly need short circuiting.
A new USB to SATA converter is needed for each new hard drive which is added to the system, and later on new USB HUBs are added to support more HDs. All the space where the motherboard normally is located is available for more HDs.
My experience is that this configuration was sufficient for use as a bulk storage system, and I had no issues with recording multiple TV programs while copying large files from the server over the network. I had three HDs in the storage at its peak, after which the IDE drive failed and one of the converters broke down. USB 2.0 is running on 480 Mbit frequency, which may possibly cause congestion if many of the drives are accessed in parallel (I lack deep knowledge of the USB transport inner workings).
Still, if you are looking for an idea for a bulk storage solution without adding servers or expensive NAS racks, perhaps this is something for you.


No comments:
Post a Comment